 Marketing Online Support
 1.1 Creating a new Campaign
- Select the Add button.
You'll then be presented with a new marketing campaign window.
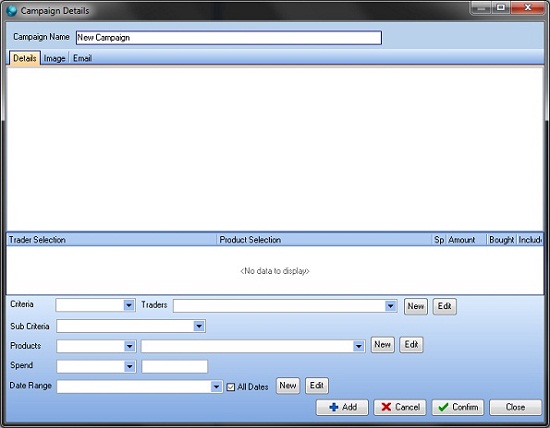
- Fill in the Campaign Name
This is normally something relating to what the campaign is for so you are able to identify it easily.
- Fill in the selection criteria for your campaign.
- Select your trader selection
You then have the ability to select if you wish to Include or Exclude traders from your campaign.
- Select your sub-criteria This can beet to one of the following options:
- None – Enables you to just use the trader selection criteria.
- Product – Enables you to use selected criteria on which looks at what products traders have bought or have not bought.
- Branch Spend – Enables you to bring back traders looking at individual branch spend, which have spent ‘less than’ or ‘more than’ a specified amount.
- Product Plus Branch Spend – Enables you to do a combined sub criteria search on product and branch spend.
- Account Spend – Enables you to bring back trader looking at the full account spend, which has spend ‘less than’ or more than a specified amount’.
- Product Plus Account Spend – Enables you to do a combined sub criteria search based on product and account spend.
Note: Depending on which option you’ve selected, you will be presented additional selection criteria for product and spend.
- Finally you need to fill in your date range selection.
Note: If you don’t require to use a date range criteria and want to use all dates, make sure the ‘All Dates’ tick box is set, otherwise un tick this option.
- If you are going to email your campaign, you will need to do the following.
- You are required to set an image against the Image tab.
- You are required to setup your email message on the email tab which will be emailed to your customers. An html editor is provided in this section, however this is quite basic.
Note: If you don’t require to use a date range criteria and want to use all dates, make sure the All Dates tick box is set, otherwise un tick this option.
- Once you’ve set up your details for your campaign to then save the criteria, you just need to make sure that you’ve selected Confirm to make it greyed out, and then select Close.
 Back To Horizon > Marketing