Horizon Online Support
 How to setup your marketing email?
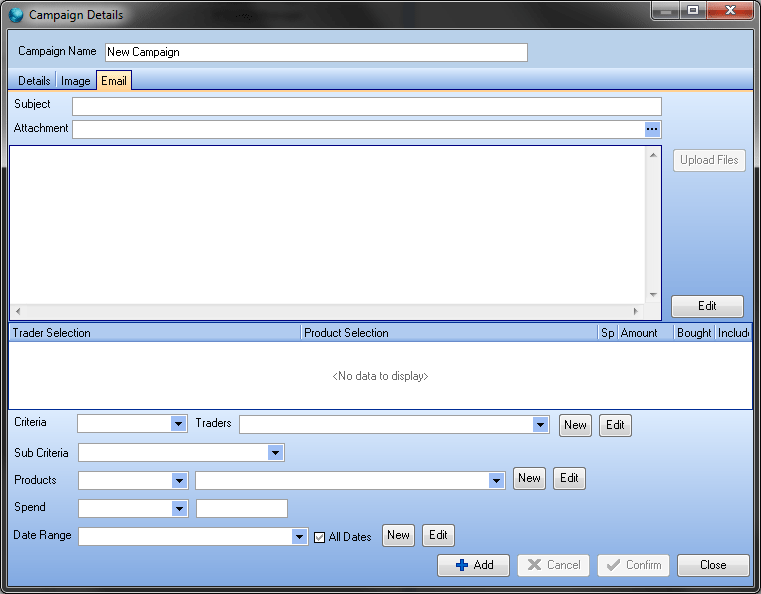
To setup your marketing email you need to go onto the ‘Email’ tab in your campaign.
Note: When designing your marketing email it is best to get all the images ready that you wish to use and store them somewhere easy assessable.

Once you have the images and the text ready you can start designing the marketing email. Marketing has a built in HTML editor which will allow you to create flyers and promotional emails.
This will allow you to insert images, text with different colours and fonts etc.
Note: If you wish to be more adventurous you can use a more advanced editor which will allow you to put things in like tables and use more fonts. Most editors come with preview modes so you can preview your flyer. It is then very easy to load the HTML created in the editor into Horizon.
Creating your marketing email.
To start creating your marketing email, you initially need to place a ‘Subject’; this will be the first thing the customer see before opening the email.
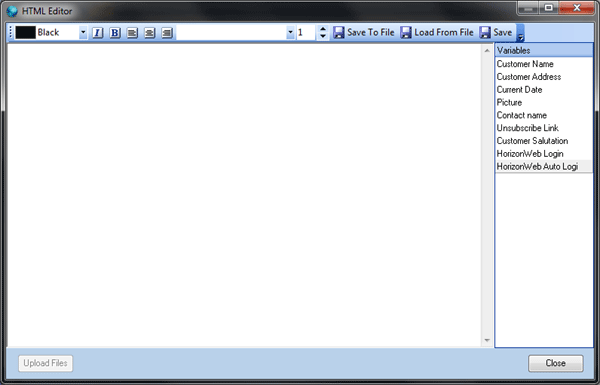
Now click on the ‘Edit’ button, this will pop up the HTML Editor screen.

You should now see the above seen. You can now add your text, and modify the font style, font size, colouring, indentation.
To insert an image all you need to do is right click on a blank area and select the option ‘Insert Image’. All you then need to do is browse to the image you wish to use.
Note: All Images used will need to be uploaded onto your HorizonWeb box. You will also have to adjust the path to your image once you have saved your marketing email in the HTML Editor.
Once you are happy with your marketing email layout, click on the ‘Save’ button to save your work. If you do not select this option and just exit, all work you have done will be lost.
How to upload Images to your HorizonWeb box.
To upload the images click on the Upload Images button whilst in the HTML editor. Select the image you want to upload and then click upload.
Note: You can select multiple images by holding down the CTRL key.
Adjusting the path on your Image.
Once you have uploaded the image to the webserver you have to make a small adjustment to the html code so that the image is viewable on the web.
For every image you have included in the HTML you need to make an alteration to the link before the image.
For example:
<img src="C:\Users\BlueSky\Desktop\00215X.gif">
As you can see in the above example in this line in your html, the image being referenced to is sat on your desktop. The actual image you want to reference is sat on your HorizonWeb box so you need to edit and change the html to reflect this.
<img src="http://xx.xx.xx.xxImages/00215X.gif">
xx.xx.xx.xx is the external ip address of your HorizonWeb box as given to you earlier in this document.
The Images folder is where the images(s) are uploaded to on your HorizonWeb box. You need to repeat this process for every image you have uploaded.
Variables available for your marketing email.
There are a range of variables available that can be used in your marketing email that brings in details of the customer into the email. These are as followed:
- %name% - Customer Name
- %address% - Customer Address
- %date% - Current Date
- %pic% - Trigger Picture
- %contactname% - Contact Name
- %unsubscribe% - Unsubscribe Link
- %salutation% - Customer Salutation
- @login@ - HorizonWeb Login link
- @autologin@ - HorizonWeb Automatic Login link
 Back To Horizon Online Support