Horizon Online Support
 How do I use the Analysis tool?
The Analysis tool can be used to generate user defined pivot grids. These can be used as a way of building your own reports.
To use this tool, open the Management tab, click  and you will see the
following,
and you will see the
following,
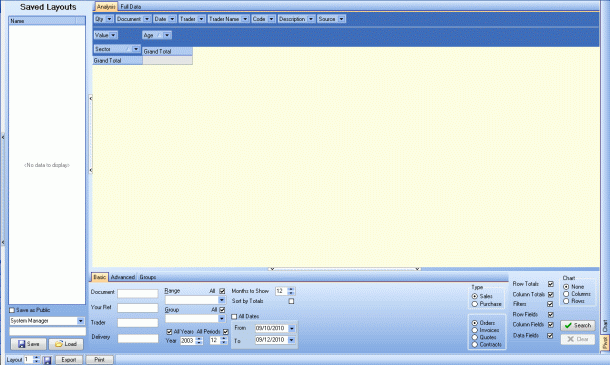
To start creating your pivot table you need to fill in some of the information on the footer of this window, 'Document', 'Your Ref',
'Trader' and 'Delivery' can all be used if you wish to view data for specific entries or accounts in the system - Leave these blank to
include everything. 'Range', 'Group', 'Year' and 'Period' can be used to restrict the data returned. The 'Months to show' can be used to set how
many months worth of data will be returned as well as being able to set a date range using the 'From' and 'To' or 'All Dates' option.

Towards the left hand side of the 'Basic' tab you have the option to select if you want to view sales or purchase data, and also
what entry types you wish to include.

The 'Advanced' and 'Groups' tabs offer further fields which can be used to limit the data returned.
The next step is to setup the grid to return the data you wish. To do this you need to add the fields to the blue headder on the
grid. To see more fields right click in the blue headder and select 'Show Field List'
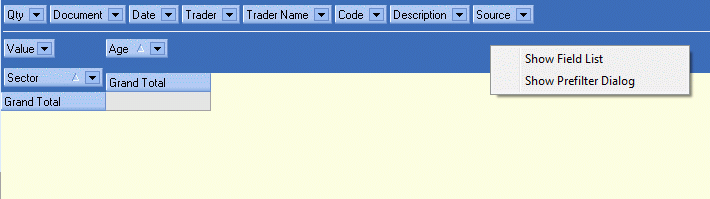
this will bring up the full list of fields available
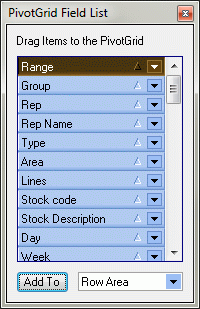
To add a field to the grid, drag and drop it from the list or the headder to the section you wish to add it to. There are
three places you can add a field.

Area 1: (Yellow box)
This section determines what will actually be shown in the cells of the analysis grid.
Area 2: (Green box)
This is used to set how the data will be ordered across, in this example 'Age' is used so we see the data in chronological order
by month.
Area 3: (Red Box)
Place fields here to set the columns of the pivot grid.
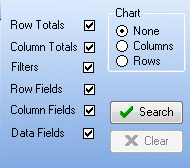
Other options available for management analysis can be found at the lower right corner of the analysis grid. These can be used
to turn off and on row and column totals as well as enable and disabling the different areas that you can add fields too.
The chart options enable you to view a barchart alongside the data.
Once you have constructed the grid you desire you can save it for future use. To do this give the grid a name, using the box above the
save button and use the dropdown to select who you wish to save it as. The 'Save as Public' option will allow everyone to use it,
not just yourself, Click the 'Save' button once you have completed this section.
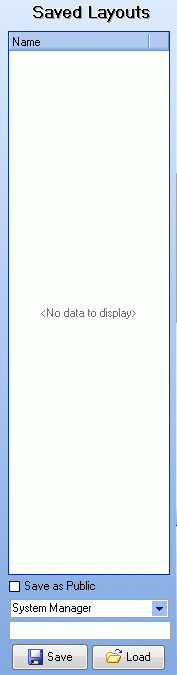
The saved the grid will appear in the list under
'Saved Layouts' where you can highlight it and click the 'Load Button' and then click search to populate the grid.
 Back To Horizon Online Support